This guide will show you how to adjust your display so that Windows 8 looks it’s best – particularly for those with high DPI displays.
The Rise In High DPI Displays
Sometimes hardware advances outpace software advances and vice versa. One area of technology that is constantly showing signs of this happening is the display arena. Even today , alot of current software was designed back when high resolution displays automatically meant that you had a huge display screen.
Of course that is no longer the case and is now becoming a lot more common for smaller displays to feature high-density pixelation.
One area where you can see the rapid rise in technology in this area is with smartphones. If you get the chance, take a look at what was deemed a cutting edge display from the original iPhone and compare it to what we have today among the smartphone market.

The trend in the computer market was for displays to continue getting bigger but we are now seeing display sizes remain the same or even smaller and instead feature higher quality and high density displays. This is also a current trend in the laptop market and is certainly a welcome one.
The problem is that some operating systems such as Windows 7 and Windows 8 are not setup to cater for such high density displays and small screens and end up showing tiny icons,graphics and text.
Step by Step
1. Step
Windows has a built in custom scaling utility. This is definitely one of the best ways to fix the problem. By using Windows scaling feature you will be able to enlarge all programs and system user interface visuals.

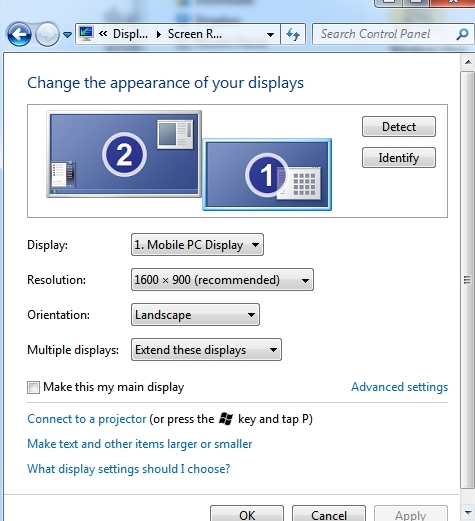
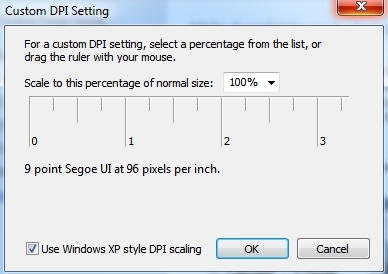
It’s also pretty easy to configure. Simply open up Control Panel and click on display. From here choose custom sizing options. Should now bring you to an options window where you should see a zoom percentage and a visual on screen ruler.

If you have a ruler at hand -you can hold it up against this ruler so that it matches up and this will give you to proportion zoom for your display.
Depending on your level of eyesight you can also simply adjust it to your own personal preferences!
2. Step
The problem with Windows built-in scaling utility is that it does not work that great with every program. Some programs will have their own built-in scaling utilities.
This can of course cause issues if your already scaling through Windows’ program. The best way around any potential problems here is to make such a program an “exception”.
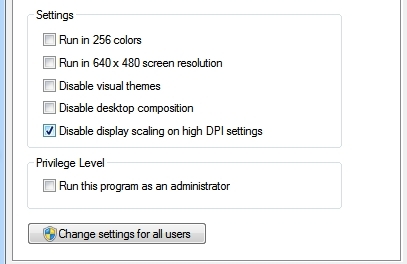
This will stop any scaling being performed on that programme and allow you to adjust it to your preferences within a program itself. Simply access the programs executable file which should be located on the root of your hard drive. Right click on it and select properties and under compatibility tab make sure the box for “Disable Display Scaling on High DPI Settings is checked” and your good to go.

3. Step
If you come across a program that seems to have some display issues with your computer or laptop screen you might want to try using Zoom. In nearly all programs zoom can be accessed by holding down the control key and using the scroll on your touchpad or mouse.
4. Step
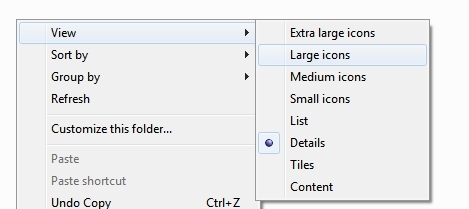
May also be a good idea to change the icon sizes if they are appearing too small on your display. Changing icon sizes is a really simple. Simply right click it and under the view tab at the top you can choose large or extra large icons .

Conclusion
Using the above steps should fix most issues that you could possibly run into with your high DPI display. As stated at the beginning of this guide – sometimes hardware outpaces software. Luckily Microsoft have moved to rectify this issue with and their new operating system update – Windows 8.1 – they integrated more High DPI friendly features.
If you are still running into issues then it’s probably worth looking at upgrading to Microsoft’s latest operating system.

