Disabling the Transparency feature that’s built into Windows 8 has proven to be bothersome for many. Here’s any easy way to do it.
Getting Around Windows 8 Transparency Restrictions
By now users of the new Windows 8 have noticed the multitude of new features that came with the OS. They’ve also probably noticed some annoying ones, like the inclusion of the Windows transparency feature.
Luckily, this is easily fixed and be changed around at will – once you know how!
If a transparent taskbar is proven to be quite annoying for you here is how to fix it.
1. Step
Microsoft has removed the option to change transparency directly within the OS when they removed Aero Glass.
Users will need to locate a program, such as Opaque Taskbar, which works on both 32-bit and 64-bit Windows 8, to be capable of adjusting transparency settings properly.
2. Step
Download Opaque Taskbar – it can be found with a quick Google search. Download the application and run the program once it is ready.

The tool is easy to find as there aren’t many options to choose from when it comes to Windows 8 UI customization.
3. Step
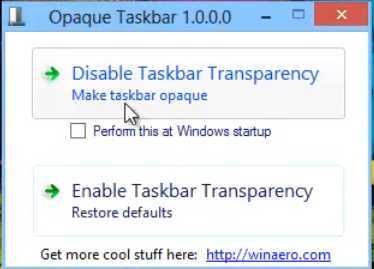
Launch the app once it has been completed. The program is quite simple and you should have no trouble navigating through its uses.

It only has two simple choices that need to be used when you want a transparent taskbar.
4. Step
With the program loaded up and ready for use, you will see an option that reads “Disable Taskbar Transparency.”
Select this button and setting will be applied to Windows 8.
5. Step
Should you need to return to the original setting with a transparent taskbar, simply Enable Taskbar Transparency once more in the Opaque Taskbar application.
6. Step
You will notice the taskbar does not remain transparent once you restart the computer. Windows will automatically make the taskbar transparent upon shutdown.
To rectify this you will need to run the Opaque Taskbar and choose the Disable Taskbar Transparency option upon start-up.