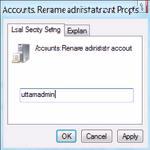
It is always a good idea to rename the Windows 8 administrator account because the default built-in administrator account is the most targeted name by hackers and malicious programs. In this tutorial, we are showing you how to rename the Windows 8 administrator account properly
- Pro-Tip: We have many articles on Windows security that may be of interest to you. Most of them are for Windows 7 but apply to Windows 8 as well.
Windows Security Tips
Steps to rename administrator account
1. Step Open the Charms bar by moving your mouse pointer over the right corner of your screen. Alternatively you may press Windows key + C on Start screen to open Charms bar. Then select Search.

2. Step Next, type ‘secpol.msc’ into the search box and click the search button. Then click on the secpol.msc icon on the left side of the pane.

3. Step Next, expand “Local Policies” by clicking on it’s expand icon.

4. Step Next, Under Local Policies on the left pane, click on the Security Options. And on the right pane, right click on the Accounts: Rename administrator account and select Properties.

5. Step Finally, rename the default administrator account name and then click on the OK button. That are the complete steps to rename the Windows 8 administrator account.
Conclusion:
Make sure to remember the name of the administrator account – if you forget it, it may be impossible to log back into that account. Should that happen you will have to crack your PC using tools like the OPH Live CD
